Elevating Durability and Integrity of Retaining Walls
Using Liquid Rubber
Retaining walls, by their very nature, are constantly exposed to varying weather conditions and moisture levels. This exposure can lead to water seepage, structural damage, and even collapse if not properly protected.
Waterproofing is not just a preventive measure; it's a vital aspect of maintaining the structural integrity of these walls. Liquid Rubber provides a robust barrier against water penetration, effectively combating the common problems associated with retaining wall deterioration.
Why Liquid Rubber is the Ideal Choice
Superior Flexibility and Durability: Liquid Rubber's unique formulation allows it to flexibly adapt to the natural movements and shifts in the retaining wall, reducing the risk of cracks and leaks.
Long-Lasting Protection: With its exceptional adhesion and weather-resistant properties, Liquid Rubber ensures a prolonged lifespan for your retaining walls, significantly reducing maintenance costs and efforts.
Eco-Friendly and Safe: Understanding the environmental impact, our sealant is eco-friendly, making it a safe choice for both residential and commercial applications.
Versatility in Application: Whether your retaining wall is new or in need of refurbishment, Liquid Rubber seamlessly adheres to various materials, providing a consistent and reliable waterproofing solution.
Ease of Use: Designed with both professionals and DIY enthusiasts in mind, Liquid Rubber ensures a straightforward application process, making it accessible for all skill levels.
Secure Your Retaining Wall in 6 Simple Stages Using Liquid Rubber
Stage 1: Power Wash for a Clean Start
Thorough Cleaning: Begin by power washing the entire surface of the retaining wall, including the footing.
Remove Debris: Make sure to scrape off any dry concrete spillages.
Stage 2: Detailing - Part 1 with Geo-Textile
Geo-Textile Application: Apply a 150mm strip of Geo-Textile along the entire wall-floor join, embedding it into the Liquid Rubber Waterproof Sealant.
Stage 3: Detailing - Part 2 for Enhanced Protection
Bridge Cracks and Gaps: Pre-cut Geo-Textile to cover any cracks, gaps, holes, and corners, embedding it into the Waterproof Sealant for maximum sealing.
Stage 4: First Coat of Waterproof Sealant
Initial Sealant Layer: Apply a generous first coat of Liquid Rubber Waterproof Sealant to the entire retaining wall surface. Use an up-and-down motion for even coverage.
Stage 5: Second Coat for Reinforced Waterproofing
Additional Sealant Layer: Once the first coat has cured, apply a second coat of Liquid Rubber Waterproof Sealant in a left-to-right motion for comprehensive protection.
Stage 6: Final Steps with Corflute and Backfilling
Curing and Protection: Allow the Waterproof Sealant to cure for 48-72 hours before proceeding.
Applying Protection Board: Install corflute protection board post-curing.
Backfilling: Backfill with dirt, applying gravel and ag-pipe as recommended.
Step-By-Step Waterproofing Instructions
Surface Preparation: Clean the retaining wall thoroughly, including the footing. Remove any concrete spillages.
Dust Removal: Use a leaf blower to clear away any residual dust.
Geo-Textile Preparation: Cut and apply Geo-Textile to all necessary areas. Ensure a 150mm application at the wall-floor join.
Sealant Application: Apply Liquid Rubber Waterproof Sealant with a brush, carefully embedding the Geo-Textile.
Rapid Cure Option: Optionally use Rapid Cure Spray for quicker setting (watch the instructional video for guidance).
First Sealant Coat: Apply the first layer of Waterproof Sealant using an up-and-down motion.
Second Sealant Coat: Once cured, apply the second layer in a left-to-right motion.
Recommended Thickness: Aim for a 1.5mm dry-film thickness.
Final Steps: Ensure proper curing before applying corflute and backfilling with dirt. Include gravel and ag-pipe as part of the backfilling process.
Learn more about using Liquid Rubber.

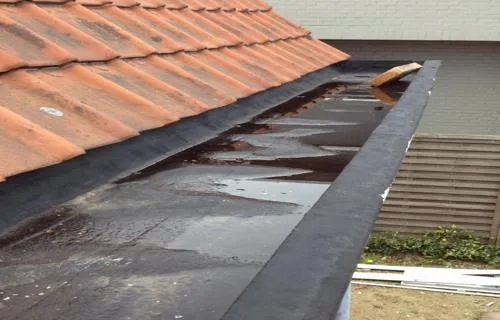
Simple DIY Gutter Maintenance with Liquid Rubber: An Australian Homeowner's Guide
When it comes to home maintenance, gutters often don’t get the attention they deserve. But in Australia, where the weather can switch from scorching sun to torrential rain in an instant, keeping your gutters in great condition is essential.
That’s where Liquid Rubber Waterproof Sealant comes in—a game-changing solution that makes gutter maintenance straightforward and effective. Follow this simple guide to protect your home and keep your gutters leak-free.

Step 1: Prepare Your Gutters
Before applying the sealant, make sure your gutters are clean and dry. Remove any leaves, dirt, or debris to ensure the Liquid Rubber adheres properly. This step is crucial for achieving a long-lasting seal.
Step 2: Mask the Area
To keep the sealant where it belongs, use painter’s tape to protect areas you don’t want to coat. This ensures a neat and professional-looking application.
Step 3: Apply the Liquid Rubber
Here’s the fun part! Generously apply the Liquid Rubber Waterproof Sealant to your gutters using a brush or roller. Once the first coat is dry to the touch, apply a second thick layer for maximum protection. This double layer forms a strong barrier to prevent leaks and withstand Australia’s unpredictable weather.

Step 4: Clean-Up
While the sealant is still wet, carefully remove the painter’s tape to maintain clean edges.
For spills: Clean them immediately with soap and water.
For dried sealant: Scrape off what you can and use mineral spirits to remove the residue.
On skin: Wash quickly with soap and water, or massage with oil if the sealant has dried. If irritation occurs, seek medical advice promptly.
Pro Tips for Best Results in Gutter Maintenance with Liquid Rubber
Avoid Extreme Heat: Don’t apply the sealant in direct sunlight, as high temperatures can affect its consistency and performance.
Check the Weather: Ensure there’s no rain or heavy dew forecast during or immediately after application. The sealant needs time to set properly.
Why Liquid Rubber Makes Gutter Maintenance Simple
With Liquid Rubber Waterproof Sealant, gutter maintenance is simple and hassle-free. Taking the time to seal your gutters now can prevent costly repairs down the track, especially with Australia’s unpredictable climate.
So grab your tools and get sealing—because a little effort today can save you big headaches tomorrow.
Happy sealing!


Simple DIY Gutter Maintenance with Liquid Rubber: An Australian Homeowner's Guide
When it comes to home maintenance, gutters often don’t get the attention they deserve. But in Australia, where the weather can switch from scorching sun to torrential rain in an instant, keeping your gutters in great condition is essential.
That’s where Liquid Rubber Waterproof Sealant comes in—a game-changing solution that makes gutter maintenance straightforward and effective. Follow this simple guide to protect your home and keep your gutters leak-free.

Step 1: Prepare Your Gutters
Before applying the sealant, make sure your gutters are clean and dry. Remove any leaves, dirt, or debris to ensure the Liquid Rubber adheres properly. This step is crucial for achieving a long-lasting seal.
Step 2: Mask the Area
To keep the sealant where it belongs, use painter’s tape to protect areas you don’t want to coat. This ensures a neat and professional-looking application.
Step 3: Apply the Liquid Rubber
Here’s the fun part! Generously apply the Liquid Rubber Waterproof Sealant to your gutters using a brush or roller. Once the first coat is dry to the touch, apply a second thick layer for maximum protection. This double layer forms a strong barrier to prevent leaks and withstand Australia’s unpredictable weather.

Step 4: Clean-Up
While the sealant is still wet, carefully remove the painter’s tape to maintain clean edges.
For spills: Clean them immediately with soap and water.
For dried sealant: Scrape off what you can and use mineral spirits to remove the residue.
On skin: Wash quickly with soap and water, or massage with oil if the sealant has dried. If irritation occurs, seek medical advice promptly.
Pro Tips for Best Results in Gutter Maintenance with Liquid Rubber
Avoid Extreme Heat: Don’t apply the sealant in direct sunlight, as high temperatures can affect its consistency and performance.
Check the Weather: Ensure there’s no rain or heavy dew forecast during or immediately after application. The sealant needs time to set properly.
Why Liquid Rubber Makes Gutter Maintenance Simple
With Liquid Rubber Waterproof Sealant, gutter maintenance is simple and hassle-free. Taking the time to seal your gutters now can prevent costly repairs down the track, especially with Australia’s unpredictable climate.
So grab your tools and get sealing—because a little effort today can save you big headaches tomorrow.
Happy sealing!

Contact Us
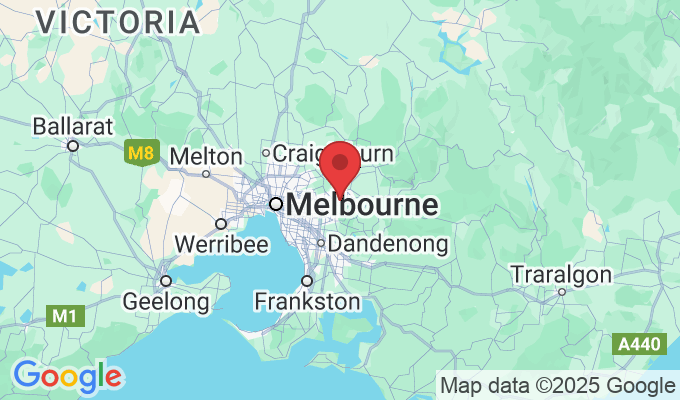
17 Vivian Street Blackburn North 3130 Victoria, Australia

